Thursday 24 December 2015

Update works in progress

So I haven't had much time to write anything lately, or do any painting! I thought I'd just share a few photos of my current works in progress...

First up is my Predator; getting a weathering job done now. I'm pretty pleased with how it has come out...For my first vehicle! I am planning to seal coat it when the weather improves and then play with some weathering pigments to finish the job.


Next is my tactical squad captain...coming along slowly. I dread to think how long the whole squad will take! The most obvious defect is the cloth. I had one go and hated the effect so I'm going to repaint it and then have a go with some glazing.


Lastly is my Dante salvage figure. I will put a post on in a bit with how he got from this:


To this:


I'm really pleased with how the gold is looking, after a lot of going back and forth. I just need to finish up with the base and do a couple of final flourishes and he will be done.

Oh and here are a couple of warriors I am doing too...busy times!


Monday 7 December 2015

Rhino WIP

Just a short post to show some WIP shots for my ongoing rhino restoration project. I just free handed the hazard stripes, my first time really experimenting with freehand techniques. I hope you like them...time to weather it down a bit now...


Monday 30 November 2015

Terminators

So I went on an eBay shopping spree and bought a bunch of the Space Hulk new release termies.  I chopped them off of the weirdy shaped bases and pinned them onto some regulation sized resin ones. I then set about painting them with my usual blood angel recipie....and here are the results.


Spot the odd one out! Captain Karlaen for good measure.

Also loved the sculpt here...did not love the FineCast. 
 For a bit of fun, I wanted to make my army commander look a bit different...like his armour had been passed down through generations. So I basically modified and changed the colour scheme on a Kaldor Draigo. He looks pretty good with the other guys...my only regret is not changing the storm shield for a blood angel assault terminator one. Sadly I couldn't get hold of the piece, so maybe later :-(


Dreadnought

This was the first miniature of my renaissance painting career! I used to love my old school metal dreadnought...None of my mates had one and it demolished everything else in 3e. He was looking a little worse for wear though; even when his torso sat upon his legs.


Not bad blending on the melta though! 

So he went for a Dettol bath, along with a bunch of my other 3e metal models.


Once cleaned down I rebuilt him as he was, adding only a resin base and a few little details that I picked up off of Bitzbox. I also drilled all of the gun barrels...something I am now doing with ally models.


Here is a few photos of him getting painted up, washed and highlighted. The recipie is exactly the same as I used for my devastators. The only difference here is that I tried to wet blend the panels to give them some tonal variation within the panels themselves. I also tried to narrow the pallet down a bit, to keep everything a bit more keyed in.


I hope you guys like it, as always feedback is gratefully received (just bear in mind this was the first mini I had painted in nearly 20 years!).

Sunday 29 November 2015

Apologies

Sorry to anyone who came to visit my blog in the last couple of days.  It seems my phone went rogue and deleted much of the photo content.  I have amended what I can now, but I am still missing some WIP shots.  To make up for it here is a photo of an angry chaplain and an unpainted Tyranid Prime.  Christmas has come early...

Grrr...

Rawr...

Saturday 28 November 2015

Rhino Salvage Job and Tank Painting

So I had a battered old predator and a mk1 rhino sitting at home...Both in need of some love. I've decided to paint them up for my Blood Angels, and add a second mk1 rhino to the brigade. Here is a brief run down of the work in progress.

I bought a particularly ropey mk1 rhino on ebay...It had clearly been  painted over a few times and even had some plastic heraldry stuck on top of the paintwork (!).  It got ripped apart and stripped in Dettol.  Sadly some damage happened to the chassis below the left hand headlight...This will become battle damage later on.  I've then had to separate many of the components to clean it properly, and scrape out what looks like araldite from the sections.

So I then set about updating things a bit. I changed the doors for new predator top hatches (with their surrounds), chopped off the bendy exhaust pipes (a couple were missing anyways) and reconstructed them with plastic tubing and scratch made the arrows for the top hatch and front plates.  I also stuck a couple of trinkets on for decoration.

Looking a lot better off now

So that's where I'm up to with the rhino...more to follow.

Here is my predator work in progress. I have painted it in exactly the same formula that I use for my marines and went for a slightly unusual colour scheme.  The sponsors have gone (too badly damaged to repair) and the autocannon (again damaged) was cut away and replaced with the lascannons.

This photo shows some early weathering that I have been doing with washes. I am going for a battle scarred and well used look here, so there's still some way to go. I may even make this my first venture into using weathering pigments...I will post more pics when it's done.


More nids

More nids finished up today...same colour scheme as the temegants, so I didn't do any work in progress shots. I did some higher highlights on the carnifex and I'm pretty pleased with it. Comments welcome as always.


Sunday 1 November 2015

Tyranid Colour Scheme

So I think nids are really cool...I got a few Termegants on the cheap and decided to have a go at painting them up. I have taken some of the inspiration from CrankyWarGamer...and modified things a bit to suit me. Let me know what you think...

First up...apologies, some of the WIP shots have been lost due to phone difficulties.  I will post some new ones in when I paint my next 'nids.  In the meantime, I have added photos of my other guys at similar stages for reference.

So I primed in black and then put a coat of Kantor Blue over the fleshy areas.  I then go over the flesh with Lothern Blue...this is when the models look at their maximum jankiness. 

Next comes a white drybrush. Now I tried to do this with deliberately poor technique to give the skin some texture. As it turns out, the rubbish drybrush looks a bit like denim when it's all washed down...not deliberate, but gives the illusion of the skin not being smooth. I really like the smoothskin style as well, I may have a go at a different hivefleet in the future...I quite fancied doing a really organic slick brown style...time is my limiting factor though.


Looking at the model at this stage, you could easily peel off here and go down an ice-nids route...that'd be cool.

Some details now; Khorne Red for all the bits. I went for a more orangey red on the plating as I did some reading about colour theory and that seemed to be a good spot against the sky blue...contrast and all that.


And here is another example, my carnifex, finished up and based (very simple sand and slate, black prime then drybrushed up in grey tones to nearly white).


I'm really keen to hear any feedback about the scheme or any other aspect of my stuffs...I will shortly post a few pictures taken with proper backgrounds etc to show my models off a bit better. Later on..

Saturday 31 October 2015

Sanguinary Priest

So, my old school apothecary was pretty shocking:

:-(

No matter, time to save myself some money and create a Sanguinary Priest.  Fistly I  stripped him off in Dettol and then set about making him a bit more 'fluff' appropriate...

Early on I decapitated him, as I particularly didn't like the helmetless effort that he came with.  I replaced that with a suitably sanguinary looking helmet.  I then added a chainsword arm from the Death Company sprue, and a really nice shoulder pad.  I also cut and attached a bolt pistol to his Narthecium arm (this was tricky because of the sizes of the bits).  Finally I pinned him to a resin base and added some purity seals etc and he looked a bit like this:


I think much better.  Next stage was to paint him up...so I went for a unique cream and red affair.  I don't really like the bright white on armour, the Deathwing style looks a bit more grimdark I think...and should sit in better with the rest of my guys.


A bit better looking now...

Still needs gems doing, basing and some touch ups here and there but a nearly done WIP.  Let me know what you guys think...This was my first attempt at converting something...so its all new for me!

Wednesday 28 October 2015

Retrospective: Devastator Salvage Job part 2

So part 2 then. This is what I had so far, base coated and now washed down to give some tonal depth to the mini. Next step is to increase the tonal variety even more by highlighting up.

My basic recipe for the various colours is as follows:

Red: restore the base colour to the plates, being sure not to disrupt the shading in the crevices. In this case that is with Mephiston Red, thinned down a bunch. Next I apply several more coats of Mephiston (always thin as you like) with the paint on the model still wet. This allows me to do a kind of wet blended effect to transition the reds up gently. Obviously each layer moves further and further from the crevices... 

Once I have pure mephiston on I move to the next shade up. This is super thin Evil Suns Scarlet. Same process again, but keeping in mind how far I wanted to take it (I like the grimdark look). Very final tickle is with Evils Sun's scarlet mixed 80:20 with a yellow...This is literally for the very tips where the light catches. 

I find it quite useful to have a photo of your model to work from when highlighting.  This means you can do some 'objective source lighting' (i think thats the right term) type highlights and make it all look a bit more convincing.  To do this I take a photo of my model just after priming in a dark room with only one light coming down from on top. It will really show you where the shadows fall and what surfaces catch the light.

Other highlight colours I use are:
Leadbelcher to reinforce the silver areas, followed by runefang silver on the very edges.

Gehannas gold to reinforce, and then a highlight of Gehannas and a brass (50:50). Final top highlight of brass and runefang (50:50)...obviously a softer transition if doing a big area...I will do a gold post a bit later on.

Edge highlight of the blacks with 50:50 black and administratum grey. I keep these quite tight to avoid the blacks looking too grey.


So there we go then....the captain is done.  In this shot the base is this fairly dreadful one...so I have changed it to key in better with my other guys, and also because darker bases tends to 'frame' the mini a bit better.  I will hopefully do a bit on basing another day..along with a bit on how I paint the gems. 

Bye for now.

Monday 26 October 2015

Retrospective: Devastator Salvage Job part 1

This is my first salvage post, about minis that I am trying to bring back from the dead. I hope other beginners might find it a useful (and cheap) way to update their lists. I won't go into too much detail, but I will try to point out the pitfalls...hope you enjoy.

So back in the day I had some devastators, led by my fave captain:

Needs some love

They're all metal or plastic/metal minis, so I did the 'Dettol' trick. Basically brown Dettol (disinfectant) is an ace acrylic paint stripper...it's also cheap, safe and available from most hardware shops.  However, tip 1 is that it stinks to high heaven...my wife was furious with the smell in the house, so just do it outdoors.

Dudes taking a Dettol bath

I left them in 24 hours, and the paint just flies off with a tooth/paintbrush. Metal seems to strip better than plastic, so you may need longer for plastic guys. There are reports that you can leave minis in almost forever and they won't degrade...the longest I can testify to is about 48 hours.  Also, DO NOT DO THIS WITH FINECAST. It will literally melt your models. There are a ton of other strippers about,  but this one works for me...


Stripped and on first attempt bases...I went off of these early on.

Onto paint then...I prme in black spray as it hides mistakes better than anything else...and boy do I need that.  I would totally recommend that everyone primes black, especially when you're starting out (sensible exceptions of course...). Then over sprayed in Mephiston red and base colours put in (leadbelcher, black, gehannas gold, hashut copper) with the brush.  I have picked a fairly narrow pallet for my Blood Angels, as you will see...this is to try and tie it all together a bit. Tip 2: never paint gold onto red (especially not GW golds as they are not heavy in the pigment department). ALWAYS put an undercoat on first.  I use Snakebite Leather, but any dark colour will do (bear in mind you will see the undercoat though the finished gold).  If you want a brighter finish then a silver base (Runefang Steel) is also good.

Tip 3: ALWAYS thin your paints. I used water at this stage, but I am experimenting with medium too...will keep you posted.


So they're back to pretty much how they were, except painted within the lines this time.  The fun starts now, with the washes. I use a combination of washes to get my tones really deep. For the metal areas I used Nuln Oil, followed by a go with Agrax Earthshade (let them dry super loads between coats).  For the rest (literally everything else) I use Seraphim Sepia to key everything in nicely, and then Agrax Earthshade to get the crevices nice and dark.  Tip whatever (I lost count): direct your washes. Use a brush to get the wash into the recesses, and don't let it pool. Avoiding plates of colour can also save you time in the highlighting stages.

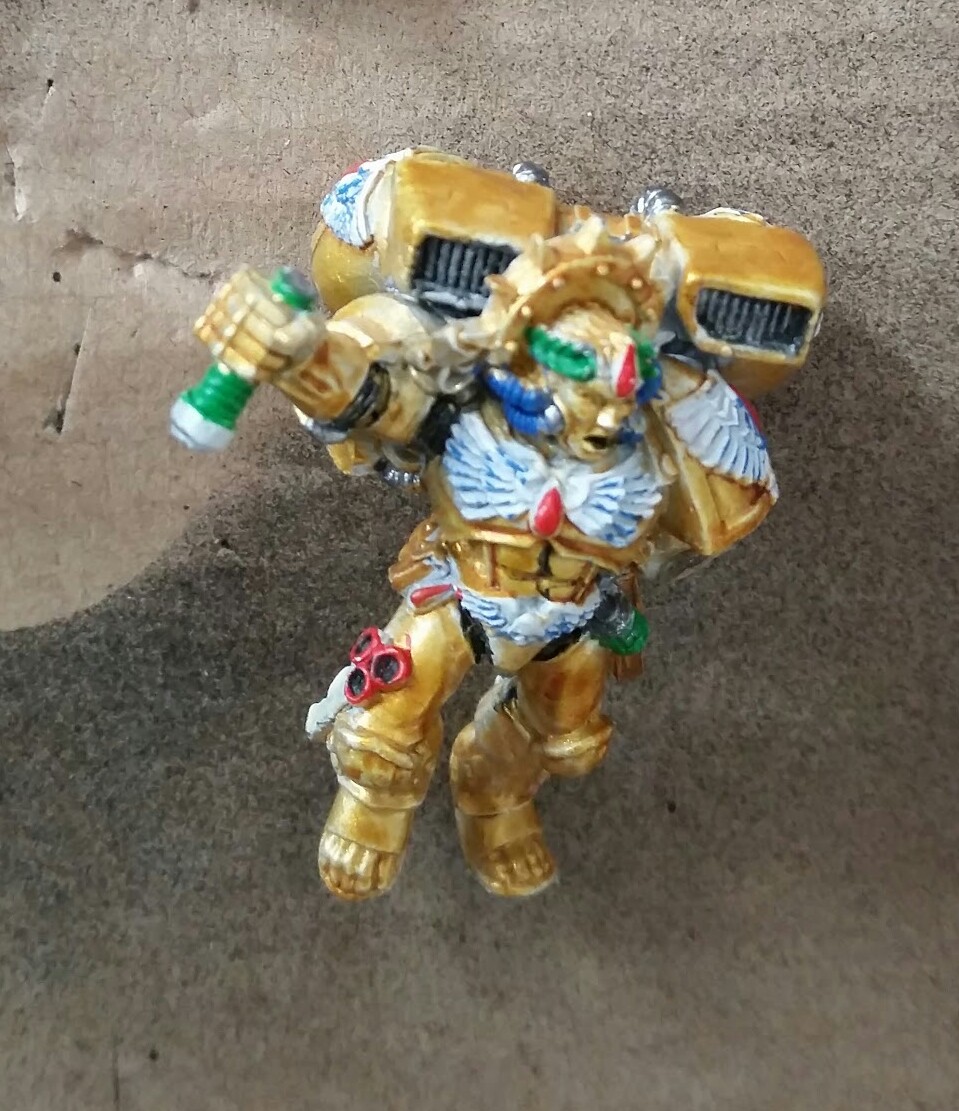
Clearly this is a different model...same stage though.  My phone has deleted many of my WIP shots...sorry!

So now the minis are pretty much table top I reckon...time to push on.  Highlighting takes forever and can be a proper pain, but if you stick with it you can get some super subtle effects. I'm gonna put the rest in another post because this got a little long...adios.

First Post

Okay, so I'm new to this...I'm not sure anyone will even read it!

I'm just a guy who has got back into 40k after a long break (20 years!), and I thought I would share some of my experiments and experiences so that others can learn from what I do!

I am a painter first and foremost, and have been repainting a lot of Rogue Trader and 2nd edition era minis...and a few new additions in between!

My first pic is a Brother Deino from the new (ish) Space Hulk. Massive thanks to Striking Scorpion 82 for the basics...as I put up some descriptions, you will see how much of an influence he has been! Also there is my new tyranid colour scheme on my Carnifex..what do you guys think?


So there we go...stay tuned for more pics and some tips on pitfalls to avoid..

Dave